Thursday 5 December 2013

How to find out if my RAM is defective

How to find out if my RAM is defective
RAM is defective

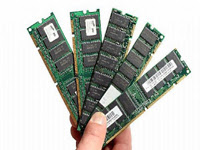
This is obvious you have to use a tool for performing ram test. The best diagnostic tool I know for the job is the free, bootable MemTest86. Since it's bootable, you need to put it onto removable media. You can download separate versions for installing the program onto a CD or on a USB flash drive.

The CD version comes as an .iso file. The USB version comes with a program that prepares a flash drive, so that it can boot your PC and automatically run MemTest86.

If you go with the USB version, you'll have to launch an .exe program in Windows, which brings up a busy and possibly intimidating little program. Don't worry; just go through the four steps onscreen. And don't use a flash drive with files that you need on it.


Once you've prepared the boot media, shut down your PC. Then unplug it, open it up, and remove all but one RAM module. If you're not sure how, check your manual. You may want to wear an anti-static bracelet for this job.

Then plug in your computer, insert the CD or flash drive (if it's not already inserted), and boot. You may be told to go into Setup because of the RAM change. Do so. Once there, check to make sure that it's showing the right amount of RAM, correct it if it isn't, then save and exit.

The PC will reboot again, and MemTest86 will start automatically. It will test all of your RAM, and when it's done (which could be an hour or more), it will start all over with a second pass. Just to be safe, I recommend three passes. Or you could start it before going to bed, and let it run all night.


If it finds something wrong, you know you have to replace that RAM module.

Still Can't Fix?
Get More Help for information about contacting us on social networks or via email, posting on Facebook, and more. Be sure to include error, stop code or problem specification you're getting, if you know it.

Friday 29 November 2013

How to set up a WiFi Router to use with your laptop

How to set up a WiFi Router to use with your laptop

set up a WiFi Router

Here is the process step by stem:

Step1. Turn off the power to your broadband modem.
Note: If there isn’t an on/off switch, remove the power supply to the device.

Step2. Connect the power adapter to the back panel of the wireless router.

Step3. Plug the adapter into an AC outlet.
Check that the power LED illuminates.

Step4. Connect an Ethernet cable to the broadband modem.

Step5. Restore the power to the modem.

Step6. Insert the other end of the Ethernet cable into the WAN (wide area network) port on the back panel of the wireless router.

Step7. Insert another Ethernet cable between LAN Port 1 (on the back panel of the wireless router) and any available Ethernet port on the NIC ( Network interface Card ) of the laptop, which you’re going to use to configure the WiFi system.

Step8.Shut down the laptop

Step9.Restart the laptop connected to the Wifi router.
Let Windows fully load.

Step10. Open your Web browser.

Step11. In the address bar of the browser, type the URL for the built-in setup screen of the wirelessrouter.


Step12. Press the Enter key.

Depending on your device maker, you may have to enter a user name such as admin (for administrator), and you may have to enter a password.

Consult the instructions for details. Once you log in, the home screen of the built-in setup system appears.

Warning: A typical automated process (wizard) includes the option to establish a password for control of your router. You should do so. This password is just to control settings made for the router.
Still Can't Fix?
Get More Help for information about contacting us on social networks or via email, posting on Facebook, and more. Be sure to include error or STOP code of the problem you're getting, if you know it.

Wednesday 20 November 2013

How to create bootable USB drive in Windows

How to create bootable USB drive in Windows

A common use of a bootable USB flash drive is to use it for booting into Windows. This can allow you to perform diagnostic on a computer that has hardware issues or can't boot into Windows. You can also use the flash drive to install windows instead of using the Windows installation CD.

This guide will outline making a bootable USB flash drive with Windows XP, Vista, and 7. Before we begin, it's important to note that the computer you want to use your bootable USB drive in will need to have the capability of booting to a USB drive. Most recent computers built since Windows Vista was released are capable of booting to a USB devices. Prior to the Windows Vista timeframe, it's hit or miss with motherboards.

create bootable USB

To determine if a computer is capable of booting to a USB device, access the computer's BIOS and check the bootable device list. If a USB device is listed, set the USB drive to be the first boot device. If you do not see a USB device in the list of bootable devices, your BIOS is not capable of booting to aUSB device. (NOTE: You may need to have your USB flash drive plugged in when you access the BIOS).

Windows Vista and windows 7 Users.

To make the bootable USB drive for Windows Vista or Windows 7, you need to have Windows Vista or 7 installed on your computer. It is recommended that you have a flash drive of at least 4 GB in size, in order to store all the necessary files.

Note: Before you start, plug in the USB drive and backup any files you have stored on the USB drive. The drive will be formatted during this process and all files on it will be deleted.

Tip: You will need a Windows Vista or Windows 7 disc for these instructions to be successful.

1. Open an elevated Windows command line window by clicking Start, typing in cmd in the search text field, then pressing CTRL + Shift + Enter on your keyboard (at the same time). You can also access this by navigating to start, All Programs, Accessories, right-click with your mouse on the Command Prompt menu item and select Run as Administrator.

2. At the command prompt, type cd c:\windows\system32 to change the directory to the Windows system32 directory. Ensure your USB drive is plugged in and type DISKPART and press Enter. Then type LIST DISK and press Enter.

3. You will see a listing of the disk drives connected to your computer. Find the disk number of your USB drive and type SELECT DISK [USB disk #], where "[USB disk #]" is the disk # for your USB drive. It should now state that your USB drive is the selected disk. If you're not sure what disk is the USB disk, eject the USB drive, perform step number 2 again, connect the USB drive again, and compare the results. Usually the USB drive will be the last drive.

4. Type in the following commands, one by one, pressing Enter after each command.

Keep the command prompt window open, but you can minimize it for a little bit.

5. You will now need your Windows Vista or 7 Installation DVD. Put the DVD in your computer's DVD drive. Open up My Computer and note which drive letter is assigned to your DVD Drive and your USBflash drive.

6. Go back to the command prompt window and type in D: CD BOOT (substitute your DVD drive letter for "D:" if necessary) and press Enter. Type CD BOOT again and press Enter. Lastly, type BOOTSECT.EXE /NT60 H: (substitute your USB flash drive letter for "H:" if necessary) and press Enter.

7. The last step is to copy the entire contents of the Windows DVD to your USB flash drive.

Your USB flash drive is now set up to be a bootable USB drive for Windows Vista or 7.


Windows XP Users.

To make the bootable USB drive for Windows XP, it is recommended that you have a flash drive of at least 4 GB in size, in order to store all the necessary files. You will also need to download windows Server 2003 SP1 and a program called PE Builder (also known as Bart PE).

Before you start, plug in the USB drive and backup any files you have stored on the USB drive, to ensure you do not lose any of them.

1. Install PE Builder on your computer. For the sake of ease, install the program to a C:\PEBuilder folder. After you've installed PE Builder, create a folder titled SRSP1 in the PEBuilder folder.

2. Now you need to extract two files from Windows Server 2003 SP1. The filename is quite long, so it is recommended that you rename the file to something shorter, like WS-SP1.exe. Open a command prompt (Start > Run, type cmd and press Enter) and use the cd command to change to the folder where you downloaded the Windows Server 2003 SP1 file to (i.e. cd c:\downloads to change to the c:\downloads folder). Then, type WS-SP1.exe -x to extract the files. A window will open, asking where to extract the files. You can enter the same folder where the file was downloaded.
3. A new folder titled i386 will be created by the extraction process. Type cd i386 to change to that folder. You now need to copy the setupldr.bin file to the SRSP1 folder you created in the PE Builder folder. Type copy setupldr.bin c:\PEBuilder\SRSP1 to copy the file.

4. You also need to expand the ramdisk.sys file to the SRSP1 folder. Type expand -r ramdisk.sy_ c:\PEBuilder\SRSP1

5. Open My Computer and navigate to the c:\PEBuilder\SRSP1 folder and verify the two files are there.

6. Next, you need to create a compressed version of Windows XP using PE Builder. Make sure you Windows XP Professional CD is in your computer's CD drive, then launch the PE Builder program. In the Source field, type in the drive letter assigned to your CD Drive (you can check in My Computer if you are not sure) (e.g. "d:"). In the Output field, type BartPE. Make sure the None option is selected in the Media output section. Then click the Build button

create bootable USB drive

A progress report will be displayed, showing the progress of the bootable image build. When the build process is complete, click the Close button.

7. Now, you can create the bootable USB flash drive. Open a command prompt again and type cd c:\PEBuilder to change to the PEBuilder folder. Make sure your USB drive is plugged in to your computer and type pe2usb -f e: (change "e:" to the drive letter assigned to your USB flash drive, if necessary) to create the bootable drive. You will be prompted to type YES to begin the process. When the process is complete, press any key to exit the program.

Your USB flash drive is now set up to be a bootable USB drive for Windows XP using the Bart PE interface.
Still Can't Fix?
Get More Help for information about contacting us on social networks or via email, posting on Facebook, and more. Be sure to include error or STOP code of the problem you're getting, if you know it.
How to fix blue screen error

How to fix blue screen error without any technical knowledge.

A Blue screen of Death, also called a STOP ERROR will appear when an issue is so serious that Windows must stop completely.
Blue Screen of Death is usually hardware or driver related. Most BSODs show a STOP code that can be used to help figure out the root cause of the Blue Screen of Death.


f the blue screen flashed and your computer rebooted automatically before you had time to read anything, see Tip #3 at the bottom of the page.


Important: Below are general Blue Screen of Death troubleshooting steps. Please reference my List of Blue screen error Codes for individual STOP code troubleshooting steps. Come back here if I don't have a troubleshooting guide for your specific STOP code or if you have no idea what your STOP code is.

Note: Some of these steps may require you to start Windows in Safe Mode. If that's not possible then skip those steps.

Time Required: It might take you several hours to fix a Blue Screen of Death, depending on the STOP Code.

Here's How to fix:

Did you just install a new program or a piece of hardware, update a driver, install an update, etc.? If so, there's a very good chance that the change you made caused the BSOD.

Undo the change you made and test again for the STOP Error. Depending on what change you made, some solutions might include:

1.The most important Blue Screen of Death troubleshooting step you can take is to ask yourself what you just did.

Startup using Last Known Good Configuration to undo recent registry and driver changes.

Use System Restore to undo recent system changes.

Roll Back device driver to version prior to your driver update.

2.Verify that a minimum amount of free space is available on your Windows partition. Blue Screens of Death and other serious issues, like data corruption, can occur if there's not enough free space on your primary partition used for the Windows operating system.

Note: Microsoft recommends that you maintain at least 100MB of free space but I regularly see problems with free space that low. I usually advise Windows users to keep at least 15% of a drive's capacity free at all times.

3. Scan you computer for viruses. Some viruses can cause a Blue Screen of Death, especially ones that infect the master boot record (MBR) or boot sector.

Important: Make sure your virus scanning software is completely up to date and that it's configured to scan the MBR and boot sector.

4.Apply all available Windows service packs and other updates. Microsoft regularly releases patches and service packs for their operating systems that may contain fixes for the cause of your BSOD.

5.Update drivers for your hardware. Most Blue Screens of Death are hardware or driver related so updated drivers could fix the cause of the STOP error.

6.Check the System and Application logs in Event Viewer (7/Vista | XP) for errors or warnings that might provide more clues on the cause of the BSOD.

7.Return hardware settings to default in Device Manager. Unless you have a specific reason to do so, the system resources that an individual piece of hardware is configured to use in Device Manager should be set to default. Non-default hardware settings have been known to cause a Blue Screen of Death.

8.Return BIOS settings to their default levels. An overclocked or misconfigured BIOS can cause all sorts of random issues, including BSODs.

Note:If you've made several customizations to your BIOS settings and don't wish to load the default ones then at least try returning clock speed, voltage settings, and BIOS memory options to their default settings and see if that fixes the STOP error.

9.Make sure all internal cables, cards, and other components are installed and seated properly. Hardware that's not firmly in place can cause a Blue Screen of Death so try reseating the following and then test for the STOP message again:

Reseat all internal data and power cables
Reseat the memory modules
Reseat any expansion cards

10.Perform diagnostic tests on all hardware you're able to test. It's highly likely that the root cause of any given Blue Screen of Death is a failing piece of hardware:

Test your system memory
Test your hard disk drive


If a test fails, replace the memory or replace the hard drive as soon as possible. 11.Update your BIOS. In some situations, and outdated BIOS could cause a Blue Screen of Death due to certain incompatibilities.

12.Start your PC with essential hardware only. A useful troubleshooting step in many situations, including BSOD issues, is to start your computer with the minimum hardware necessary to run the operating system. If your computer starts successfully it proves that one of the removed hardware devices was the cause of the STOP message.

Tip: Typically, the only necessary hardware for starting your PC through to the operating system includes the motherboard, CPU, RAM, primary hard drive, keyboard, video card, and monitor.

Tips:

1.Find that hardware is the cause of your Blue Screen of Death? Try this:

Replace the hardware.
Update the hardware's firmware.
Make sure the hardware is on the Hardware Compatibility List.
Check with the manufacturer for support information.

2.Find that a software program is the cause of your Blue Screen of Death? Try this:

Reinstall the software.
for and install any available program updates.
Check with the developer for support information.
Try a competing program.

3.Is your PC restarting before you can read the STOP Code on the Blue Screen of Death?

Most Windows PCs are configured to reboot immediately after receiving a serious error like a BSOD. You can prevent this reboot by disabling the automatic restart on system failure option.

Still Can't Fix?

Get More Help for information about contacting us on social networks or via email, posting on Facebook, and more. Be sure to include error or STOP code of the problem you're getting, if you know it.

Thursday 24 October 2013

How to fix Crashed Java.

How to fix crashed Java in Windows?

Step by step process to fix Java.

Step 1 - Go to your Control Panel and uninstall Java completely.


Step 2 - After uninstalling java, go to Appdata folder and from local law folder delete Sun folder

Windows XP user can go to "C:\Document and Settings\Username\Local Setting\Application Data"
Windows Vista/7 user can just type %appdata% into the search bar.


Note: Note that this a hidden folder show you need to have hidden folder and files switched on.

Step 3 - Now go to www.java.com and reinstall the lateset Java to your computer.

fix Crashed Java

Your java will 100% work.

Content Source www.learninggoods.com


Saturday 12 October 2013

How to get your fileice account approved

How to get a fileice account approved


fileice account approved


 Fileice PPD network


 Step by step guide to get you fileice account approved.

Step 1: Visit fileice.net and fill out the online application form located in the registration area. The information you submit will be forwarded to a fileice staff member for evaluation.

Keep your application formal. Make sure you don't make any mistake while feeling the form.

Name - Put you full name. ( This is self-explanatory )

Note - Always use your real information.

Email - Put you real email address. ( This is self-explanatory )

Reason for signing up - Here you will find 2 options

fileice account approved


Website -  Choose your website.

This is up to you. If you do have your own specific blog or domain, list it and then you will be asked to verify it to prove you are the owner of the website/blog. I would suggest you have some sort of blog before registering as it increases your chances of being accepted. After you have verified your website, proceed.

If you do not have a website or blog, you are to explain a minimum of 80 words of how you are going to make money and bring traffic to your fileice offers. Make sure to be honest about it. If you have previous experience with other PPD networks like Sharecash or Fileflare for example, make sure you screenshot your earnings and show them that you are a dedicated earner. Also state where you are going to get your traffic from. Remember to use proper punctuation and grammar so you do not look in experienced. 

After you believe you have put in a lot of effort and time to make your application look high quality enough to be accepted, click Submit.

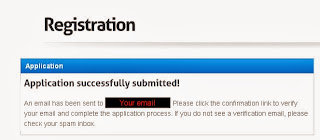
You should then be redirected to application submitted! page like this.

fileice account approved


Congratulations your application is now submitted! and hopefully will be approved soon.

Note - if you register under a referral. your application will be approved in next 24 hours.

For my referral click the button below

fileice account approved


Wednesday 9 October 2013

How to increase blog traffic.

Best ways to increase blog traffic

How to increase your blog traffic ?

These Tips may increase your blog traffic by at least 227 percent if you follow them correctly. Of course a specific percentage of growth can't be guaranteed, I assure you that instituting these practices into your blogging will help your business, too.

Title

The title of your blog is THE most important factor before creating a blog. Since it's the first thing a potential reader sees, a good title catches the viewers attention, creates some controversy, plays off a common saying, mentions newsworthy keywords or names, hints at conflict, delineates action, and maybe proposes a question that the reader now wants answered and it has to be short also.

Topic

The Topic is also the most important factor. Find out what most of the people are looking for. A blog could be just to entertain, provide education, tell a story, or to solve a problem.

Website "URL"

Make sure you have a short URL that's easy to spell and remember.

You can also shorten your long blog link to a shorter URL through TinyUrl.com, Hootsuite, etc. which makes it easier to share and re tweet.

Easy to use

A bad design can keep readers from looking at your site. Make sure your blog is easy to read and that your most important features are easy to find. Recruit a few friends to check out the site and tell you if they have any problems getting around and reading your posts. Depending on what platform you're using, you may have limited control over the design of your blog, but take the time to learn how to customize what you can and make your site as user friendly as possible.

Something free

Offer the readers something for free in your blog, but don't be afraid to surrender control of your content without asking for an email or any other strings attached. People are savvy. If you give people quality content that provides value, they'll reach out to you, spread the word, or come back to order more in the future. If they don't like what you have to offer, then having their email address doesn't do you any good.


Publicize you site

Tell all your friends that you have a new blog. Ask them to check it out and recommend it to their friends. You can do this by talking directly to your friends, sending instant messages or by putting a link to your blog in your web forum signature.

Content rich in links and keywords

Incorporate plenty of key words into your blog, the same ones a reader might type into a search engine like Google. Mix it up with some quotes from notable people, clickable links to other articles (or blogs you've written) and mentions of famous people, organizations, companies, etc. But don't go overboard until your blog is no longer organic and easily readable

Link exchange

Seek out blogs and websites that cover the same material you do in your blog and ask if they would like to exchange links. If they accept, they will put links to your blog on their sites and you will put links to their sites on yours. You can also exchange links with friends, but keep in mind that their websites may not have the same focus as your blog and their readers may not be interested in what you're writing about.

Join blog aggregators

Make sure that they are informed when you update your blog, whether you do it automatically or manually.

Optimize you blog in search engine queries

Try to get your blog listed on the first page. If your blog has a high rank, people can more easily find your blog.

Social bookmarking sites

Social bookmarking sites list websites and blogs that have been submitted to them. If you have friends or regular readers using these social bookmarking sites, asks them to like or bookmark your blog. This will help your blog to become visible to more people.

Mind mapping

Mind mapping is a concept that tracks how our eyes and then our brain views, perceives, and processes information, and assigns it context. In the field of blogging, mind mapping will help you incorporates physical cues to keep your audience engaged, like photos, headers, sub headers, bullet points, indents, and even changes in color or font. Remember that a blog of just text is less likely to be read and shared than a blog anchored by a photo and broken into clear, logical sections of information, easy for the brain to follow and process.


How to make money online.

5 Best ideas to make money online

How to make money online ?

For making money online this is pretty much require if you have your own Web site, products to sell and some marketing savvy. But a new generation of .com have arisen that will pay you for what you know and who you know without you having to be a web designer or a marketing genius.

The answer is here. These ideas can give you a way to make money online.

Blogging

If you're a passionate closet writer who wants to be published but can't find a way to do so, make each keystroke your way to wealth by penning your own blog. Starting a blog doesn't require extensive technical skills but it's important that you have expertise in the field you are writing on. This will attract visitors to your site. Building a large following will enable you to earn profit by luring advertisers, writing paid reviews or getting commissions for promoting other people's products.

Advertising

You can sell space on your Website or blog for advertisements and you earn when these ads are clicked by visitors to your site. The sorting and placing of ads is free. The profitability of pay-per-click advertising depends on the traffic level of the Website and, most importantly, on the clickthrough rate and cost per click. Google AdSense is the most popular option, while others are BidVertiser, Text Link Ads and Blogads. Direct banner and RSS feed are some other forms of online advertising.


Affiliate or Reseller

For those who have the knack of selling, one of the best ways to make money online is to become an affiliate/reseller. An affiliate is a person who gets a commission for selling every product that he promotes, whether on his Website or through any other avenue such as eBay. You don't have to own the product. You only need to sign up for an affiliate program with a company and start selling its products under your referral link. Firms such as Commission Junction or Click Bank have a large pool of products.

Online Marketing

Once a Website is created and optimised for search engine (SEO), the SEM or Search Engine Marketing begins. A treasure trove lies hidden here. An SEO/SEM expert, who is responsible for marketing a Website, can promote it in various ways. These include article marketing, writing press releases, forum posting, blog posting, submitting your site to directories and search engines, social bookmarking, etc. Most companies don't do this in-house and pay you to conduct the SEM for them.

Youtube


If there's a dramatic performer hidden inside you who craves applause and adulation, upload yourself on YouTube. You can be a filmmaker, musician or comedian who wants a wider audience. Your earnings will come from ads displayed on your video page. This process is similar to the pay-per-click advertising program common to other Websites and blogs. Sites such as Flixya and Mediaflix can be helpful in this regard.


Thursday 25 July 2013

How to optimize a computer.

Learn how to optimize a windows based computer  ?

We all know that Computer is an Essential part of our life and they are expensive as well. So what are the  appropriate steps we should take to increase life of you computer.

Here I am gonna give you a Magic stick. you can increase your computer's life by using that once in a week.

Optimizing a windows based Computer is easy and simple. if someone tells you that you required any external software for optimizing your computer. I am sure he is not a computer savvy person. A windows based computer contain everything which you required to optimize you computer.

Watch this Tutorial Video and I am sure if you will use this process for you computer once in week. Your computer will never ask you spend a lot on that.

The only software I will recommend you to buy is a good and trusted Antivirus. A antivirus is required because there is a lot of bad stuff waiting for you computer on Internet and if you use internet on you computer. I will recommend you to go for a Antivirus as soon as possible if don't have one in you computer.

By following this tutorial you are saving you time which spend for bringing you computer to a computer shop as well as you saving your money.

optimize a computer.

 Click the icon for watching video


If you liked this Video Tutorial. If there is anything you failed to understand please write in comments below and We will answer you soon. 

 We have made all the possible tries to make this tutorial error less. but still we can not warrant full   correctness.


Content Source www.learninggoods.com